Monday, June 2, 2014

Say CHEESE

Can we all just take a moment to praise the good lord that I CAN EAT DAIRY AGAIN.

So bring on the cheese, butter, milk, ice cream… wait… I should probably slow down before I gain a million pounds.

But seriously, someone should alert Pizza Luce that they are not allowed to send me any more GF pizzasmy thighs would thank you. 


ANYWAYS, to celebrate my newfound ease with eating I decided to make my favorite dessert that does not come dairy free ENJOY! 


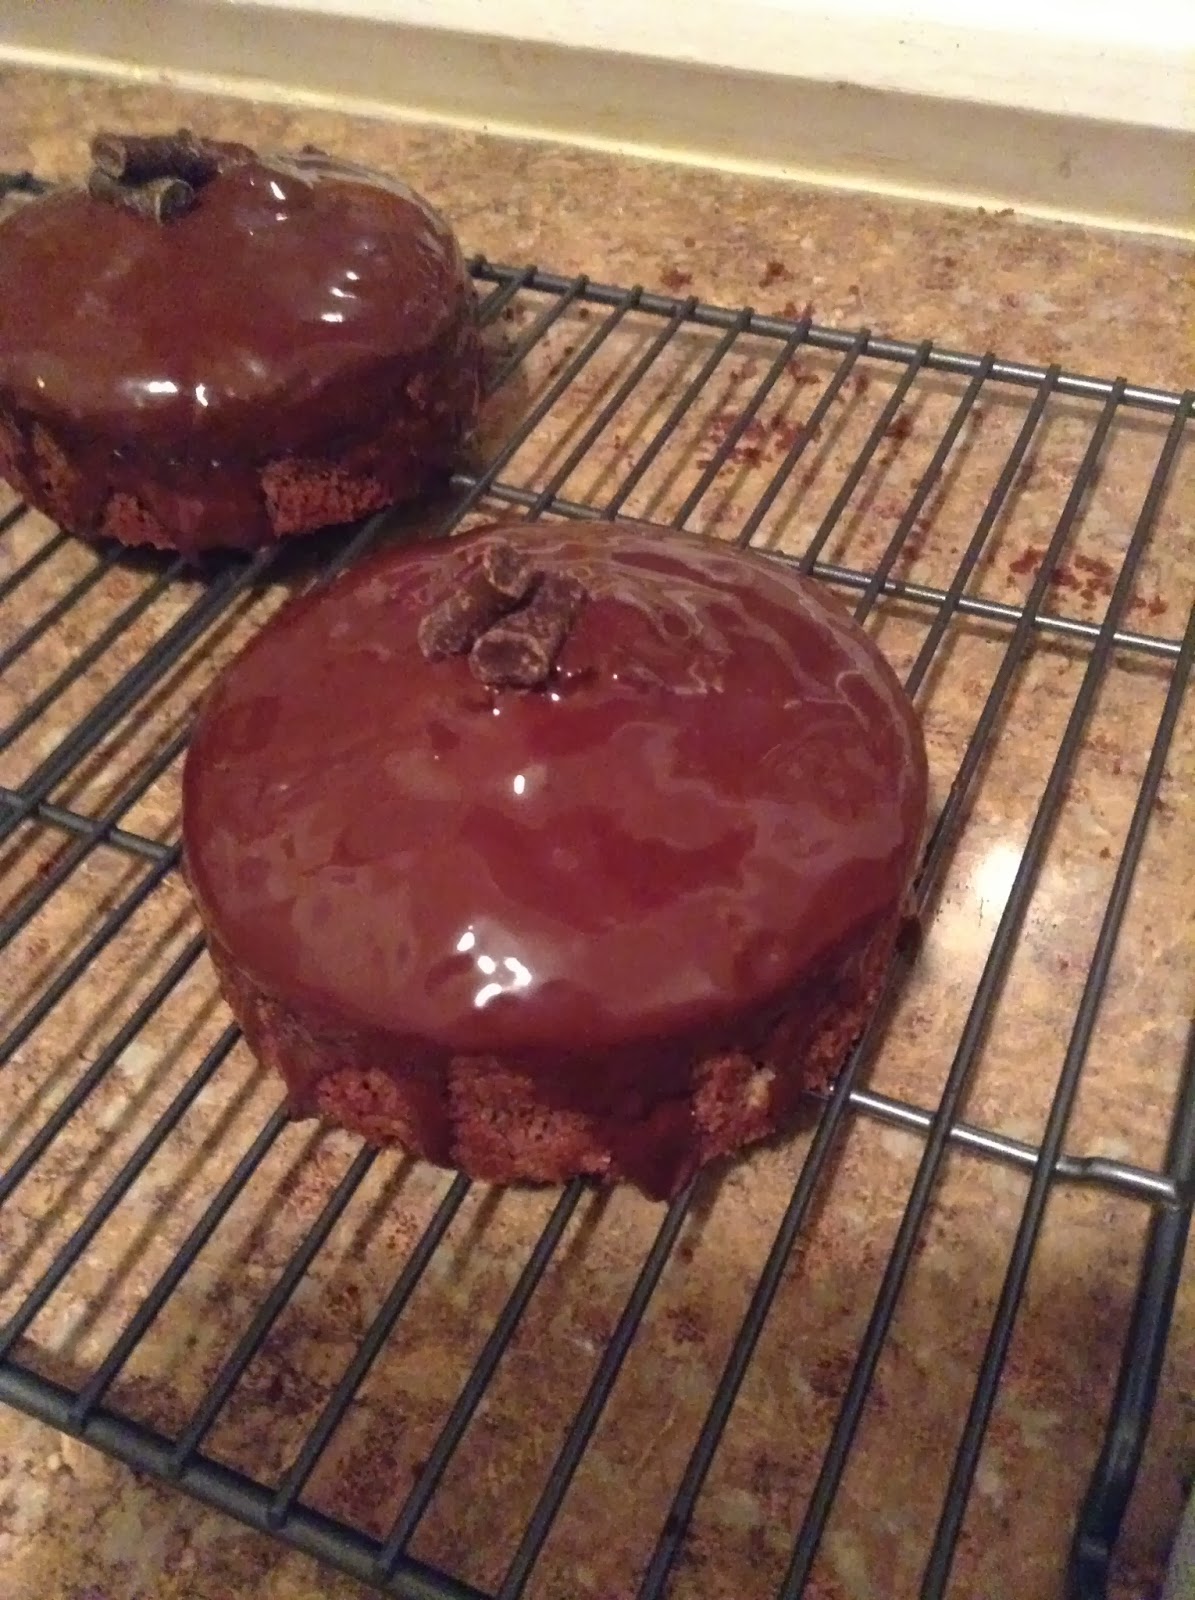
Double Chocolate Cheesecake (Gluten free, NOT at all in any way, shape, or form, dairy free)

****Adapted from deep dark chocolate cheesecake from epicuruous.com

 ingredients
Crust
   1 package gluten free graham crackers (I found mine at whole foods, brand kinnikinnick foods, s'moreables graham style crackers) 
   1 tablespoon sugar
   1/4 cup (1/2 stick) butter, melted
Filling
   2- 4 oz Ghirardelli chocolate bars- chopped (I used 60 percent cacao bittersweet chocolate, but substitute any chocolate you would like)
   4 (8-ounce) packages cream cheese, room temperature
   1 1/4 cups plus 2 tablespoons sugar
   1/4 cup unsweetened cocoa powder 
   4 large eggs
Topping
   3/4 cup whipping cream
   1- 4oz chocolate bar- dark- chopped 
   1 tablespoon sugar
   Bittersweet chocolate curls
preparation
For crust:
Preheat oven to 350°F. Butter 9-inch-diameter spring-form pan with 3-inch-high sides. Blend cookies in processor until finely ground; blend in sugar.(I used a plastic bag and a rolling pin). Add melted butter and process until well blended. Press crumbs evenly onto bottom (not sides) of prepared pan. Bake just until set, about 5 minutes. Cool while preparing filling.
For filling:
Stir chopped chocolate in metal bowl set over saucepan of simmering water until melted and smooth. Remove bowl from over water; cool chocolate until lukewarm but still pourable. Blend cream cheese, sugar, and cocoa powder in processor until smooth. Blend in eggs 1 at a time. Mix in lukewarm chocolate. Pour filling over crust; smooth top. Bake until center is just set and just appears dry, about 1 hour. Cool 5 minutes. Run knife around sides of cake to loosen. Chill overnight.
For topping:
Stir cream, 6 ounces chocolate, and sugar in heavy medium saucepan over low heat until smooth. Cool slightly. Pour over center of cheesecake, spreading to within 1/2 inch of edge and filling any cracks. Chill until topping is set, about 1 hour. 

Release pan sides and remove, add chocolate curls to top.


Happy Living!
~M


Sunday, March 16, 2014

My number one

So my posting is VERY infrequent due to the frequency of things school has me doing...

But this weekend warranted a post.... because so many things happened that have me just bursting at the seams with smiles.

To start off, it was a very hard couple weeks at school. Test scores have not been my friend, assignments are never ending, and clinicals drain every ounce of energy I have left over... After my 8 hour shift last thursday I believe it took me 5 whole seconds to lay on the couch and fall asleep.. for three hours...sorry not sorry...

But anyways, after this crazy stressful week I had the most wonderful weekend and I just want to share it with everyone, because good things come to those who wait... and sometimes God puts things in your life when you reach the breaking point and need them the most.

Boy did I need it.

First my boss gave me Saturday off... just because (YAY) ..so I preceded to plan out my weekend of fun starting with that.... I then realized we didn't have a test on monday for nursing which NEVER happens..

usually my sundays are spent in my apartment, pajama pants on, books out, wine glass by my side (just kidding Mom) pouring over pages of nursing (amazingness) trying to figure out how to remember every  single one of the billion.. seriously billion.. hypertension medications out there.

Friday I got to nanny all day for my ADORABLE 4 month old cousin, and got to spend some time with my mom as she came over to visit her niece (and favorite child).


PS babies are a lot of work... wait a while to get knocked up... seriously, just babysit for a baby all day and your legs will be CLOSED.

Saturday I picked up a cake for my friend Sara, grabbed Starbucks, which was graciously paid for by a neighbor who happened to be behind me in line, ran over to her house, and helped her prep for her "girls" party later that day.

I then ran a few more errands, had lunch/coffee with a friend, went to Sara's for the fabulous party, donned my St. Patricks day gear and headed over to my aunt and uncle's St. Paddy's Day party for the night. I was able to see many extended family members that I don't often see, and shared many giggles (and drinks) with the fabulous Dillon clan.

SISTAH SISTAHH


LOVE my uncles.

Sunday I again had my coffee paid for at caribou this time by the very cute barista (male version?) who said.."its your birthday today right? (Cue Maria's puzzled expression) , right yeah happy birthday! You get a free drink! So sweet!

My sister and I then headed downtown to see my cousins perform with their irish dance company at the landmark center. We were able to see even more extended family on my other side, bringing many cousin hugs and catch up sessions.


My heart just gushes watching these girls grow as performers and as young women, and I am so blessed to be able to spend so much time with them during the summer and see them grow through the school year.

I could not be more proud!


I then got a text saying that my U10 girls hockey team that I had gotten so close to last year had made it to the state championship and their game was at 4.

The perfect timing for me to go home, change, and head out to the rink to watch those dear girls play their hearts out. I was unable to help with their team this year due to my school load, and only made a couple games, yet it worked out perfectly for me to make their last game and see them win the state title! Oh boy do i miss seeing those adorable faces every week!


I adore these girls and their wonderful families!


So in a nutshell, it was a weekend full of unexpectedness, new friends, old friends, family, blessings, coffee, and joy.

I KNOW that sounds so cheesy but this weekend gave me just the energizer I needed, and the reminder that no matter how hard things get, just look around and notice all the good things in your life, because THAT is why you work your butt off... to make those people proud.

All the nursing professors say "School should be your number one". No, school is not my number one, yes it is my priority, but my family and friends are my number one. Because if I didn't have all of those people in my life cheering me on, I would not have made it this far in the program.

School isn't a life, people you love and who love you are a life. Appreciate them.

So thank you to all of the people I saw this weekend, thank you for being part of my number one.

Happy Living
~M


Monday, February 10, 2014

Finding "The One"

I recently was asked to write for an awesome blog Called "Girls in Real life" where college girls share their stories about loving themselves and dealing with the day to day pressures in a women's life.

I absolutely LOVED writing for them and thought I should share!
Enjoy!


Finding "The One"


I cannot be the only girl out there who is wondering WHEN will it happen for me, when will I finally meet a decent guy who will take me on dates, send me texts just because, and give me butterflies.

I am still young, still have so much ahead of me, but that longing for companionship can sometimes be discouraging in the life of a nursing student stuck in the constant pile of homework, and countless hours of work

Even through the craziness of my school life, I still wonder when it will happen, when I will meet “that guy” and be able to gush about how in love I am.

On those days when I find myself thinking about this, I remember a statement I read somewhere in an article about being “in your 20’s” It went something like this:

The most important thing you will do in your 20’s is learn how to love yourself. Until you do this, nothing else matters…

That hit home. Reading that made so much sense I couldn’t believe it. I needed to stop thinking and worrying about when I will find someone, but rather take that time and channel it into becoming the best person I can be.

I am always learning new things about myself, but am I working towards really loving myself?

I’m getting there, I have been learning, and it’s eye opening thinking deeply about who you want to be.

I want to be a good Christian, help people as much as I can, be the friend that people can rely on. I am not interested in going out and getting drunk, I was raised Catholic and therefore carry values that make me laugh when a guy asks if I want to make out the first time we hang out. No thanks! Lets get to know each other a little first, okay?

I love hockey, all food, baking, and the movie “My Big Fat Greek Wedding”.  I hate studying, going to the gym, and the fact that I cannot eat gluten. 

I aim to be a good person. It is a simple as that, and in the process am learning about how to stand up for that girl inside.

I believe this….

Your 20’s are a delicate balance between being yourself and becoming who your want to be.

So I’m working on that. Working on becoming who I want to be, while loving who I already am. 

And maybe eventually, I will meet someone who ignites that “can’t eat can’t sleep, reach-for-the-stars, over-the-fence, World Series kind of stuff” feeling I dream about.

And it will be even greater if I love myself in the process.

Happy Living!
~M


Tuesday, January 14, 2014

Bannnanannannaaaa Bread

A classic recipe with a Gf Df twist!
This recipe is modified from Silvana Nardonne's Cookbook

Banana Bread
11/4 Silvana's flour mix
2 Teaspoons baking powder
11/2 tsp ground cinnamon
1/4 tsp salt
2 large eggs
1 cup plus 2 tablespoons sugar
1 1/4 cup bananna (about 3 ripe bananas)
2 tsp vanilla
1/2 cup vegetable oil

Instructions:
1. oven at 350, grease an 81/2 by 4/12 inch loaf pan, in large bowl, whisk together the flour, baking powder, cinnamon, and salt
2. in a small bowl whisk together eggs, sugar, bananas, vanilla, and oil. Stir the wet ingredients into the dry until just combined. Pour batter into prepared pan. bake until golden and a toothpick comes out dry, about 50 minutes. Let cool in pan on wire rack.


Happy Living!
~M

Monday, January 6, 2014

Mini Cakes

I can try to be that person who sits around all day.... butttt I went a little stir crazy.. so I continued to work on my baking skills...

This recipe is a branch off of Silvana's marble loaf cake. 

Because I am still in possession of my mother's mini spring form pans, I decided to make mini cakes, nut realizing I did not have any vanilla in my apartment, AND the guys next door didnt have any either... (long shot), AND it is too cold to venture to the neighborhood grocery store, I had to improvise by making the entire cake chocolate. 

So, here it is!

Gluten Free Chocolate Chocolate Mini Cakes 


Ingredients:
3 Tablespoons Unsweetened Cocoa powder
3 Tablespoons Boiling water
2 Large Eggs
1 cup sugar
1/2 cup Vegetable Oil
1/2 Cup water
1 Cup Silvana's Gluten-free All purpose flour 
1 Teaspoon Baking powder
1/4 Tsp Sat
1.5 Cups Dairy free chocolate chunks or chips
3 tablespoons shortening


  • Mix together Cocoa powder and boiling water, set aside 
  • Beat eggs and sugar until smooth and frothy, then add in oil and water
  • In a separate Bowl mix together flour, baking powder and salt. 
  • Add flour mixture to wet ingredients and mix
  • add in the cocoa and water sauce and mix until combined. 
  • Divide mixture equally in the 3 mini springform pans 
  • Bake at 350 degrees for about 35-45 minutes
  • I recommend putting small pans on a cookie sheet to make transfers easier, test the cake's "doneness' by using a toothpick and watching if it comes out clean. 
  • Let cakes cool, and remove springform sides and bottoms, place on a wire rack
  • melt the shortening and chocolate chips until liquid consistancy 
  • spoon chocolate mixture over cakes in small amounts, letting the chocolate coat the entirety of the cake. 
  • Let sit to harden, or place in refrigerator for faster finish. 
Enjoy!
Happy Living
~M 

One VERY cold winter day

Anyone living in minnesota currently is feeling the sub zero temperatures that hit us late last night...
 currently it is about -20, feeling like -35... heat wave right?!

Being that I am still on break from school, and loving every minute of it, I decided to spend the entire day at my apartment, avoiding the cold, and trying out new recipes I have been longing to eat. So, along with the Harry Potter Marathon playing on our TV, pedicures with my roommate, and scattered episodes of Downton Abbey, I played around with a childhood favorite. Chicken pot pie, the perfect comfort food, and Gluten and Dairy free of course!

Here is the recipe I found at (alittleinsanity.com) modified with my own flour blend
Next time I believe I will add a little more seasoning, and possibly some potatoes to go along with the vegetables.


GLUTEN FREE CHICKEN POT PIE
 

INGREDIENTS
PREP TIME
COOK TIME
TOTAL TIME


Gluten & Dairy Free Pie Crust

This recipe makes 2 Bottom Pie Crusts or 1 Set (top & bottom) Pie Crusts.
Ingredients:
    2 cups of Silvana's all purpose flour 
    1/2 cup Shortening
    1 egg
    2/3 cup water (approx. depending on consistency – add a little at a time – not too wet, not too dry.)
    1/2 tsp salt (or season to taste)
    2 tsp sugar or alt. sweetener for desserts if desired (or sweeten to taste) ( I add about 4 tablespoons if i am using the crust for my pumpkin pie or apple pie) Only salt for this recipe. 
PROCEDURE:
    Mix together Gluten Free Flour along with optional Salt & Sugar.
    Add in Shortening (or butter), and mix until crumbly.
    Add in Egg and mix until well incorporated – mixture will still be crumbly.
    Add Water by stirring in 1 TBSP at a time until dough holds together for rolling – better a little moist, then too dry.
    Cut Mixture in Half and roll into 2 balls (one for each crust or topping).
- for the pot pie recipe, i use small springform pans, so break the dough into 5 Equal balls, 4 for bottoms of pans, and one to slice for topping. 
Roll out each ball of dough and form inside pans. 
~~~~~~~~~~~~~~~~~~~~~~~~~~~~~~~~~~~~~~~~~~~~~~~~~~~~~~~~~~

Pot Pie Recipe: 
BOIL INGREDIENTS:
  • 2 Fresh or Frozen Boneless Chicken Breasts  (Boiled & Shredded) – Feel free to use your favorite meat, or make it Vegetarian!
  • 4 Cups (32 oz) of Chicken Broth/Stock, ( check label to make sure it is GF! ) 
SAUTE INGREDIENTS:
  • 3 Cloves Garlic – minced
  • ½ Sweet Onion – chopped
  • ¼ Cup Olive Oil
  • 1 Stalk Celery – sliced thin
  • 2½ Cups Fresh or Frozen Veggie Mix (peas, carrots, corn, green beans, edamame, etc…)
  • Salt & Pepper to Taste
THICKENER:
INSTRUCTIONS
  1. Boil Chicken in the Chicken Broth in a large pot until Chicken is done. Then shred or cube Chicken into small pieces.
  2. In Deep Fry Pan, Sauté Garlic & Onion in Olive Oil until soft.
  3. Add Celery & Fresh/Frozen Veggies to Sauté and stir until well mixed and warm.
  4. Add Sauté Ingredients to the Chicken & Remaining broth from what you boiled the Chicken in, and stir until mixture returns to boil.
  5. Add in All purpose GF flour (I use Silvana's mix)  1 Tablespoon at a time until mixture is thick.
  6. Pour into prepared shell and add strips on top or another full layer of dough in a large pie pan. 
  7. Place prepared Chicken Pot Pie on Foil Lined Baking Sheet to catch any boil-over & mess.
  8. Bake at 425 degrees until crust is golden brown. Approximately 30-45 minutes.
  9. Cool for 10 minutes and serve. Tastes great hot or cold.
  10. Store leftovers in airtight container for up to 3 days in fridge.

You can also freeze the uncooked pot pies for an easy dinner in coming weeks, i make about 4 and freeze the ones i will not eat that day, Freeze uncooked and add about 3 minutes cooking time if baking the frozen pies. 


for the mini pans, i used something similar to these

 -http://www.target.com/p/cake-boss-novelty-bakeware-4-piece-nonstick-mini-springform-pan-set/-/A-14876134?ref=tgt_adv_XSG10001&AFID=Google_PLA_df&LNM=%7C14876134&CPNG=Kitchen&kpid=14876134&LID=PA&ci_src=17588969&ci_sku=14876134&gclid=CL-MiO296rsCFYlDMgodWikA9Q

You can always make one big pie using a tin or glass pie dish, if serving many people or like to eat a lot at one time! 

Keep warm out there everyone!
Happy Living 
~M


Tuesday, October 22, 2013

Apple Brown Sugar Coffee Cake

Thanks to my clinical schedule I have a couple tuesdays off... so  I took this wonderful gift of time to do something for myself... I filled my day with activities I have put off due to school, clinicals, and homework.

So i got up, watched a little Harry Potter, made a hot pot of hazelnut coffee, and lounged in my room for about an hour, then I bundled up and window shopped (and real life shopped) around my neighborhood, took a trip to target, and baked a delicious fall treat! It was a wonderful day!

Here is the recipe for the Apple brown sugar coffee cake,  This recipe is straight out of Silvana Nardone's cookbook, 'Cooking for Isaiah".  and guess what.... It is gluten AND dairy free!!! Whoo hoo!!!


  1. Preheat the oven to 375°. Lightly grease a 9-in. round baking or springform pan. In a large bowl, whisk together 1 cup flour, baking powder and salt. In a small bowl, stir together the remaining 2 teaspoons flour, 1/2 cup brown sugar, chocolate chips, walnuts and cinnamon.
  2. In another small bowl, whisk together the eggs, granulated sugar and remaining 1/4 cup brown sugar until smooth. Whisk in the oil and vanilla. Stir into the flour mixture until just combined. Pour half the batter into prepared pan, top with half the apples and half the crumb mixture; repeat with the remaining batter, apples and crumb mixture. Bake until a toothpick inserted in the center comes out clean, 30-35 minutes. Yield: 8 servings

Another FABULOUS fall tip I must share with you guys....
I learned this easy trick from spending an evening with my good friend Sara.... Take the peels from the apples you are using, or just slice an apple and use the peels.. and take the core and put it in a saucepan about 3/4 full of water. Add about a tablespoon of cinnamon and bring to a boil, turn down to let it simmer and it automatically makes your kitchen/apartment smell AMAZING.... a little taste of fall!

Happy Fall Living!
~M